by colpar0 | Mar 9, 2021 |
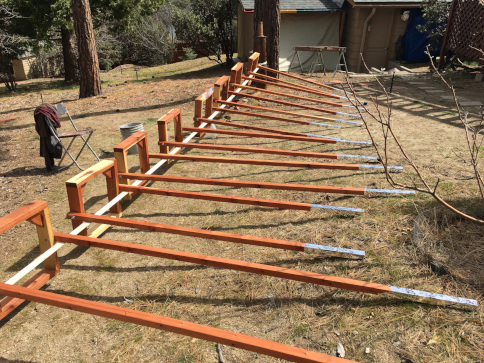
During each winter since the Cypress Trees had been planted in 2018 there were snowstorms that caused them to either fall over or have broken limbs. The trees miraculously survived being toppled and buried but it was a difficult effort to dig them out and stake them up again and again. So for the health and growth of the trees and for our own peace of mind we decided to build some redwood tree stands that could support the trees during these snowstorms. The design consists of the redwood stands themselves which are then supported by stainless steel guide wires and ground anchors. Here are the tree stands after being build and tung oiled for weather protection: The bottoms of the stands are wrapped in building tape to protect them from water in the soil. Here are three photos of the stands installed on their trees. They worked out so so well and we even had some late snow to test them out. Don’t the trees look...
by colpar0 | Nov 21, 2020 |
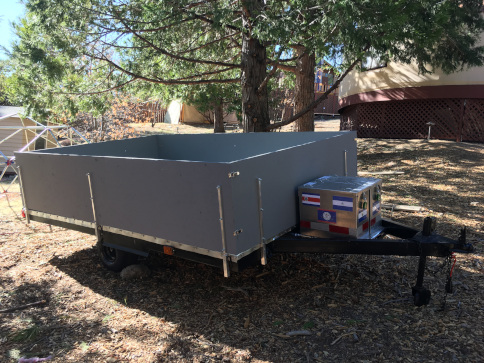
As P&P had big plans to build a new cabin as well as other projects in the coming years, Colin decided that he would renovate an old Burning Man trailer and use it going forward for lumber and dump runs so that he could sell his truck and be fully electric. The old trailer had been sitting on the property in Garner Valley for several years and needed extensive renovation. This was accomplished with the help of another Workawayer named Oliver, from Ecuador. The steps involved were as follows: Removal of Old Wheels Removal of Rotten Plywood Boards Removal of Rust from Metal Components Spray Painting with Black Rust-o-leum Performance Enamel Installation of New Wheels Painting New Plywood Bed with Exterior Paint Installation of New Plywood Bed Installation of Galvanized Sheet Metal over Plywood Bed Creation of Front Shelf for Pannier Boxes Installation of Aluminum Pannier Boxes Installation of Trailer Lights and Electrical Hookup Building Aluminum and Plywood Walls Here is the trailer after renovation without the walls installed: And here it is totally completed with the walls on...
by colpar0 | Oct 28, 2020 |
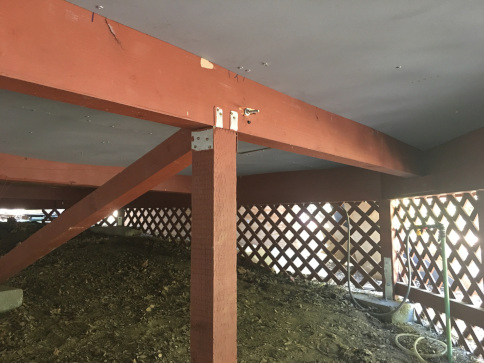
The insulation under the floor of the yurt has always been exposed to the air and unfortunately it became too inviting for rats and mice which began to create nests over the years. This not being good for them or for P&P we wanted to do something and the obvious solution was to put impenetrable sheathing underneath the yurt to create a proper boundary. The workawayers Brenden and Julianna had time to tackle this last big and difficult task before their departure. The sheathing was 1/4″ plywood painted with grey exterior paint. It took about 25 4′ x 8′ panels to complete the project and it was very challenging to install in the confined space underneath the...
by colpar0 | Oct 17, 2020 |
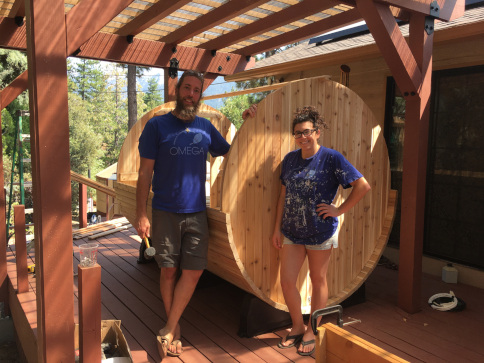
After the deck renovations and pergola were completed, we were ready to build the sauna that had been ordered the previous winter and sat in its box in the driveway all year. The location of the sauna had been chosen prior to building the pergola, and it was to have a nice view of Tahquitz Peak from underneath the pergola. The sauna was built by two workawayers (see workaway.info if you’re unfamiliar) named Brenden and Julianna. They were the first workaway guests that P&P had hosted and they had such a wonderful independent work ethic and sense of quality. They were able to complete the entire construction except the electrical work for the 240v sauna heater which Colin took care of. Here’s the sauna towards the beginning of construction: Here it is after adding the door wall: More progress (benches and heater wall installed): Here’s my favorite pic of the construction: The completed Sauna: Completed sauna front: The inside of the completed...
by colpar0 | Sep 15, 2020 |
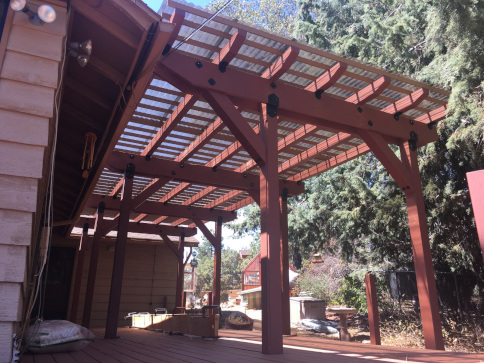
As we worked on the deck renovations and continued around to the back of the house, we decided to take the opportunity to upgrade the existing shade structure over the patio area and extend it to cover the whole back deck. This led to the creation of a very sturdy and pretty pergola with polycarbonate roofing panels on top. We started installing 6×6 posts and footings: Once the posts were up, we added the 2×12 cross beams and secured them with black ornamental hardware: After the 2x12s we added 6×6 45-degree braces and long 4×6 joists to the top: Finally we added 1×3 joists and the polycarbonate roofing. We were very happy with the completed...

Recent Comments